
Field Report user guide
A clear path from site photos to a report you can hand over. Choose the workflow that matches your role.
For app version 0.20.5 and later · Updated October 8, 2026
Before you start
Sign in to your own account
Register with your email, then sign in with a password or email verification code. Use the same account for purchases, team access and saved online templates. The login screen follows your phone’s supported language; unsupported languages use English.
Choose your path
Working alone? Follow the solo steps below. A team administrator buys a team plan and grants seats. Invited members sign in with their own registered email and use the team authorization; they do not need to buy another plan.
Know what needs a connection
Once signed in, local capture, editing and PDF generation can work offline. Login, team uploads and synchronization, online templates and customer links need a connection. Team authorization must refresh online at least once every 24 hours. Keep backups of local projects.
Solo: from the first photo to a finished report
Create a project
On the project home screen, create a project and enter its name. Complete the customer, address and inspector details as needed. If you use location, allow access when requested and check the result before saving.
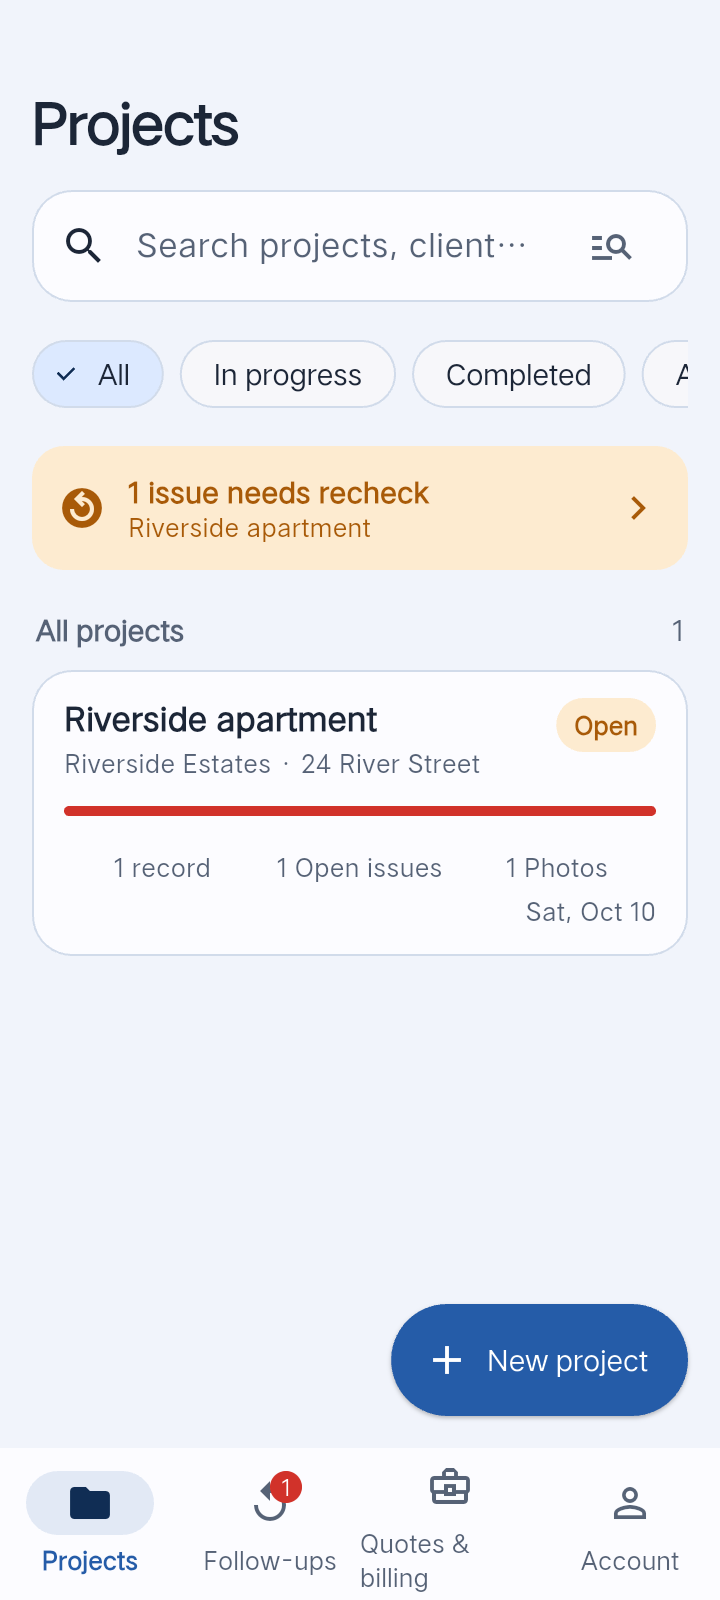
Start here: tap New project.Actual app UI · Demo data · Tap to enlarge 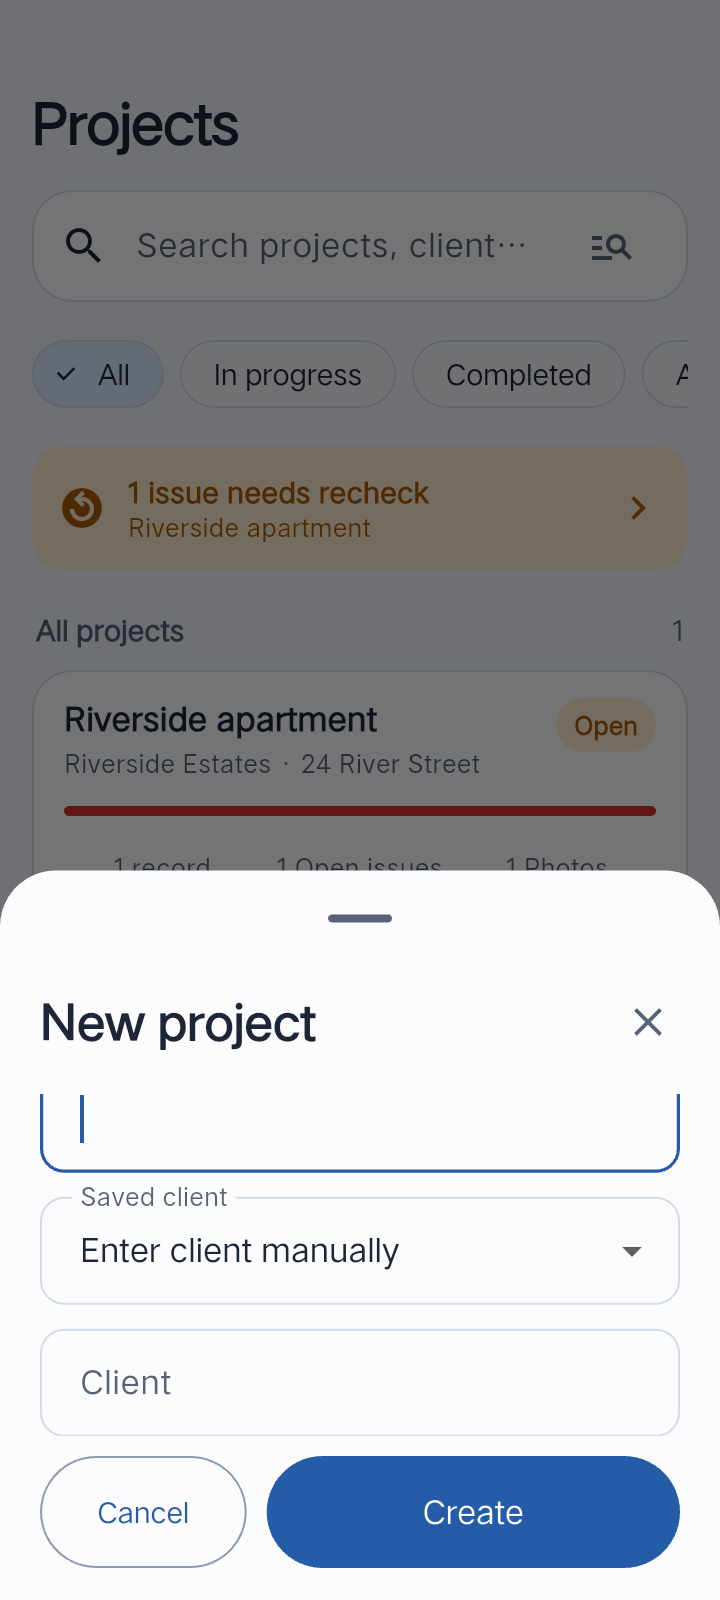
Enter the name and project details, then create.Actual app UI · Demo data · Tap to enlarge Capture an issue
Open the project and use the camera button. Choose the built-in camera or your phone’s system camera; confirm the photo before returning. Add an issue title, location and description, and annotate photos where useful. Save, then check that the issue appears in the project.
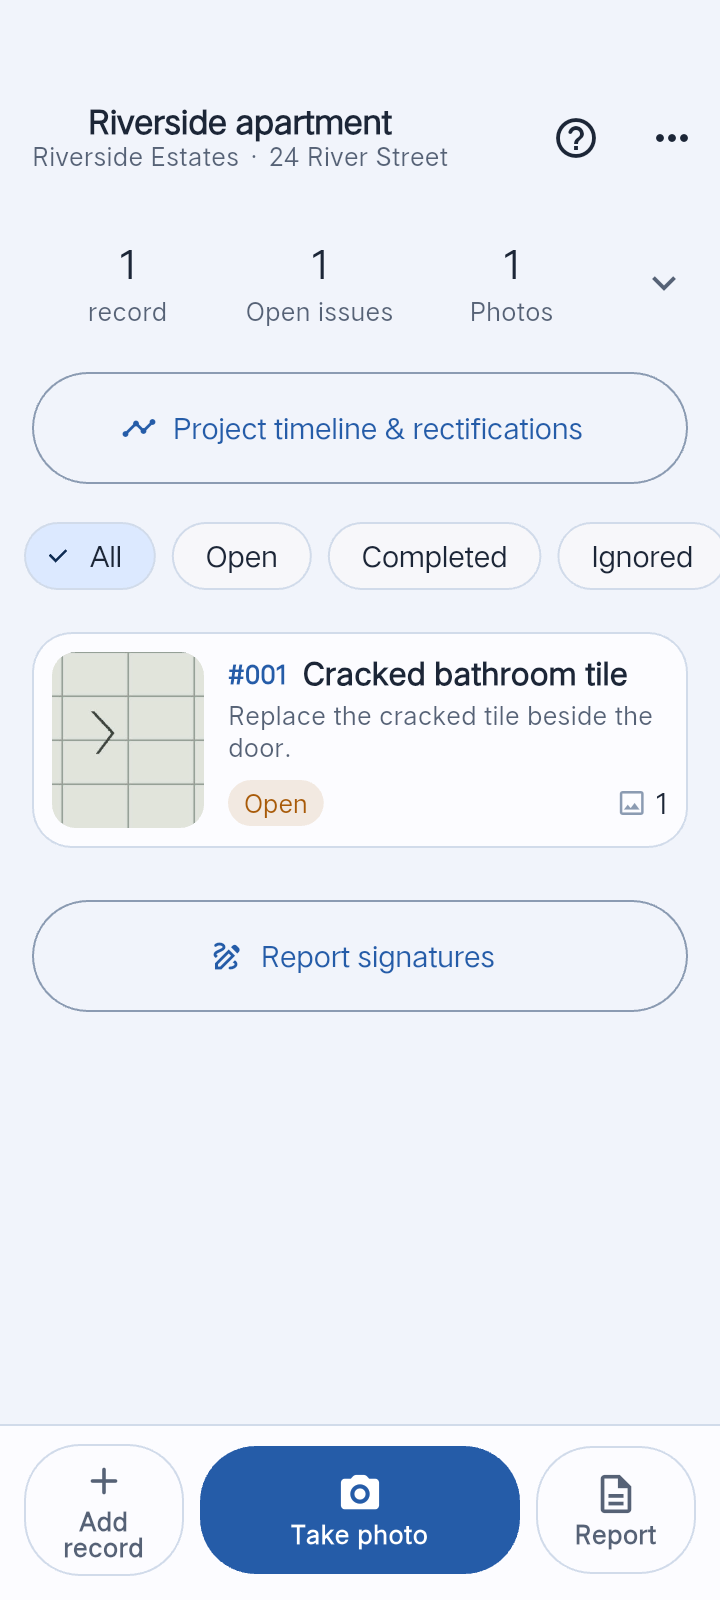
Open a project. The camera button starts a new photo record.Actual app UI · Demo data · Tap to enlarge 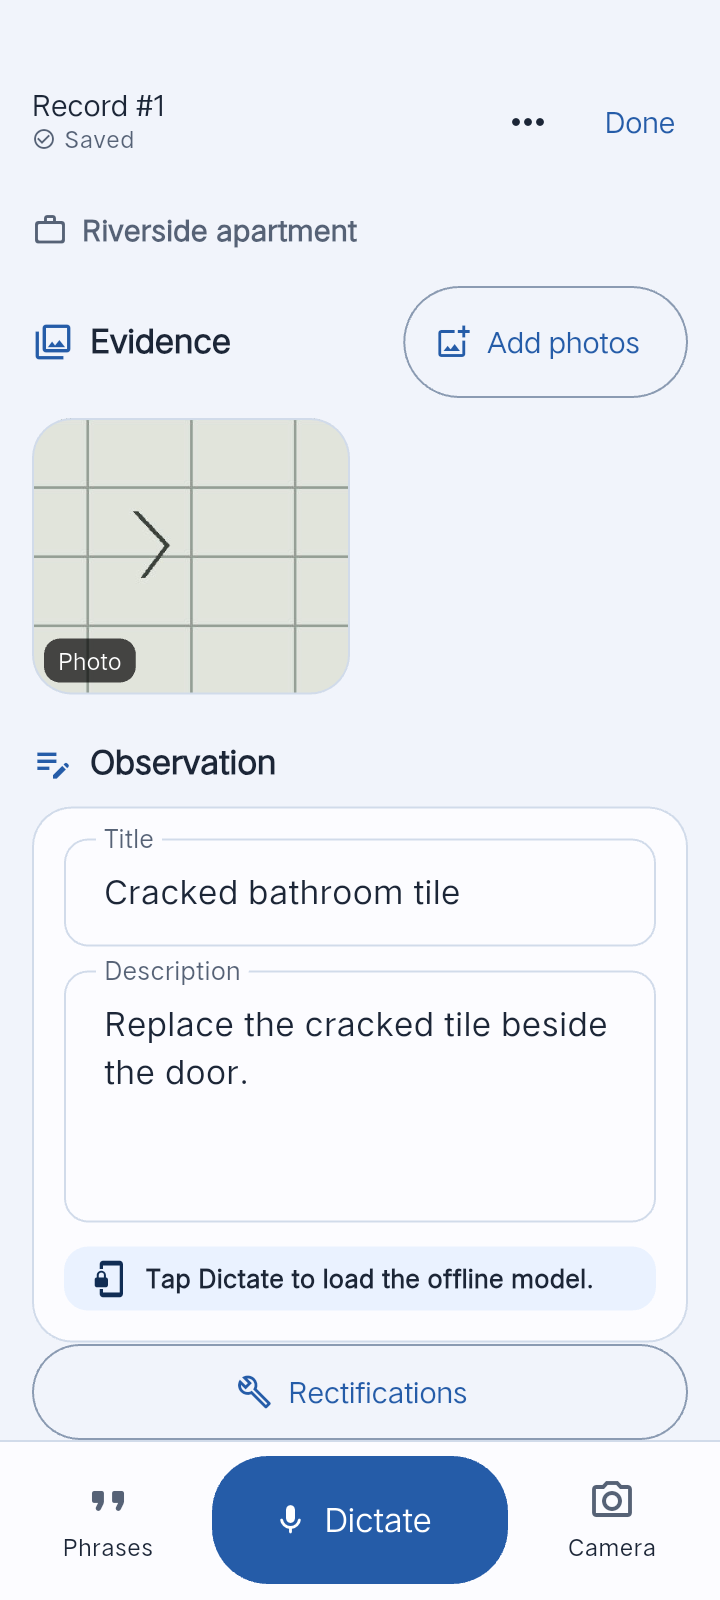
Review the evidence and edit the issue details.Actual app UI · Demo data · Tap to enlarge Turn a sentence into a draft
In the project’s More menu, open the sentence recording feature. Type or dictate the observation, then check and edit the draft before saving. For example: “Bathroom, cracked tile beside the door.” This helps organize text; it does not automatically diagnose a defect from a photo.
Record the rectification
Open the issue and enter rectification. Add after photos and a note, then confirm the status before saving; the edit screen initially selects Completed. In the rectification camera, use the original photo as an alignment reference to reproduce the angle. The reference overlay is not saved into the new photo.
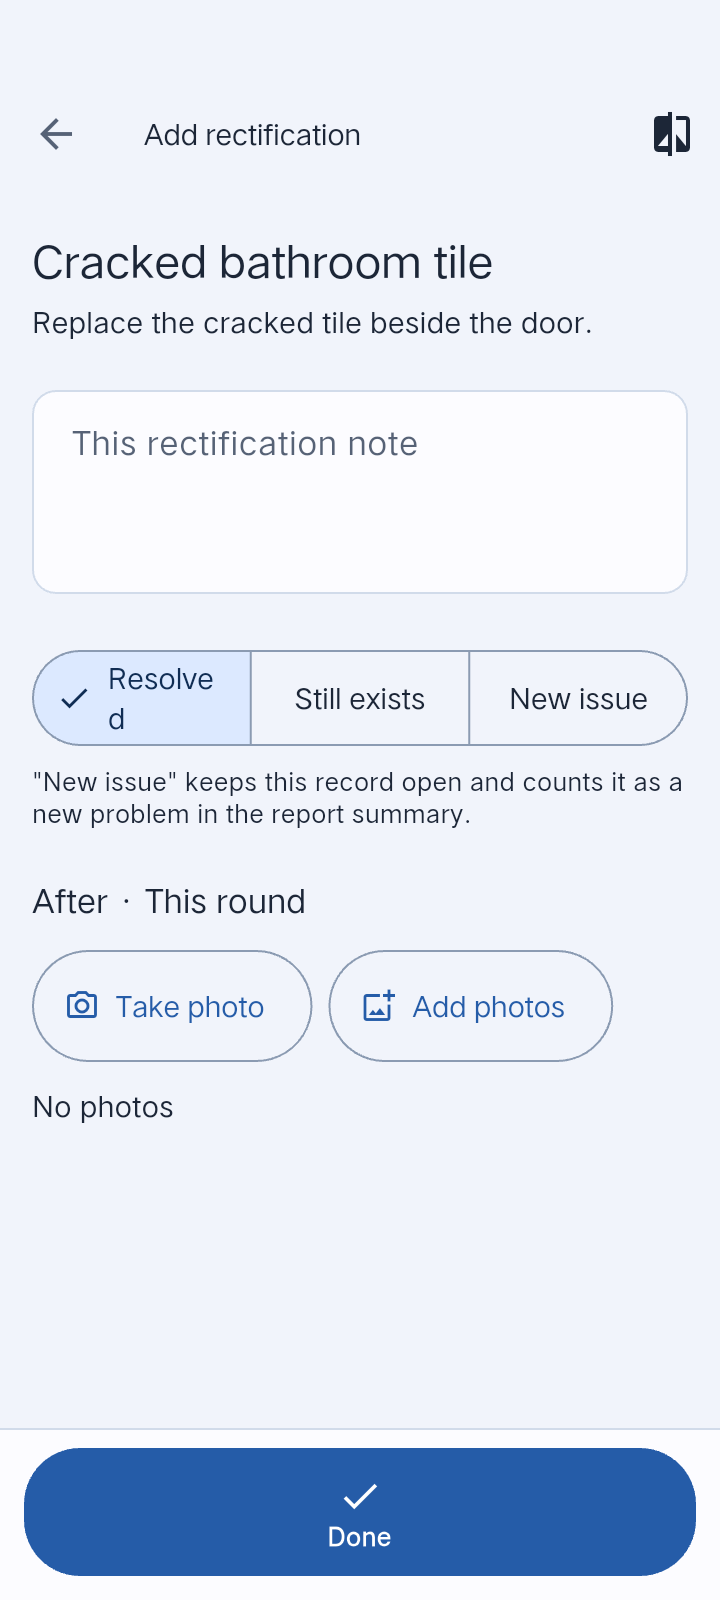
Add after photos, check the status and save.Actual app UI · Demo data · Tap to enlarge Review and finish
Review the project timeline and rectification records. When every issue is completed, the Finish project button appears above the camera button. If the problem returns, use the reinspection workflow to retain the earlier evidence and the new round.
Deliver the result
Choose the project’s PDF template, preview the report, and complete any required signatures before exporting. Share the PDF, or create a before/after comparison card from rectification or reinspection photos. For browser viewing and feedback, preview the PDF and explicitly confirm publishing a customer link.
Team administrator: set up, assign and deliver
Grant a team seat
After purchasing a team plan in the app, open Account → Team licenses. Ask each member to register first, then grant a seat using their registered email. Add their display name when assigning authorization; this is also used for the inspector name in their Library. The purchaser counts toward the seat limit.
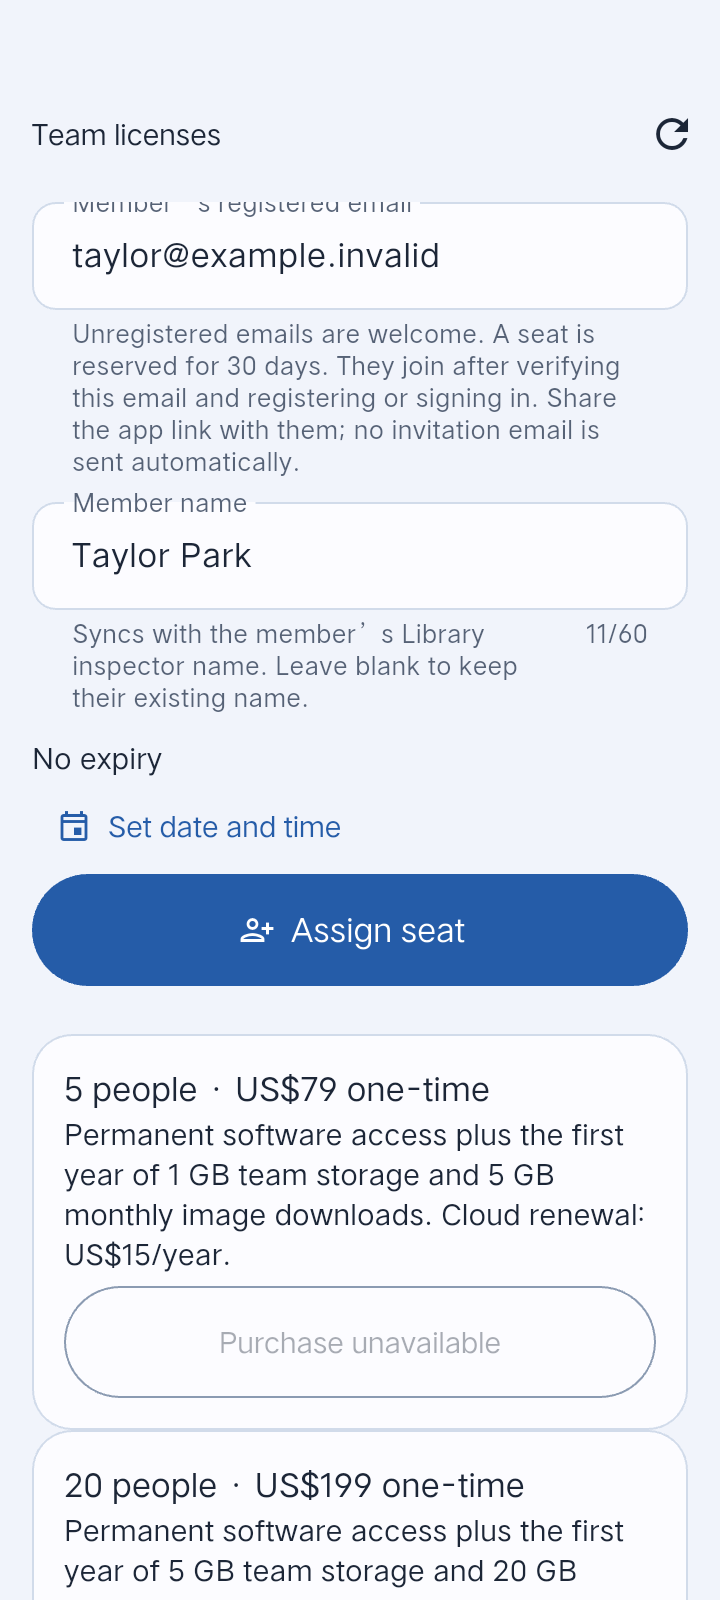
Enter a registered email and a name, then grant authorization.Actual app UI · Demo data · Tap to enlarge Add members to a specific project
Open your local project → More → Team projects, enable the team project, then add authorized members. A software seat alone does not add someone to every project. Tap a member’s name to enable Allow issue reporting and/or Allow rectification submission, then save the permissions.
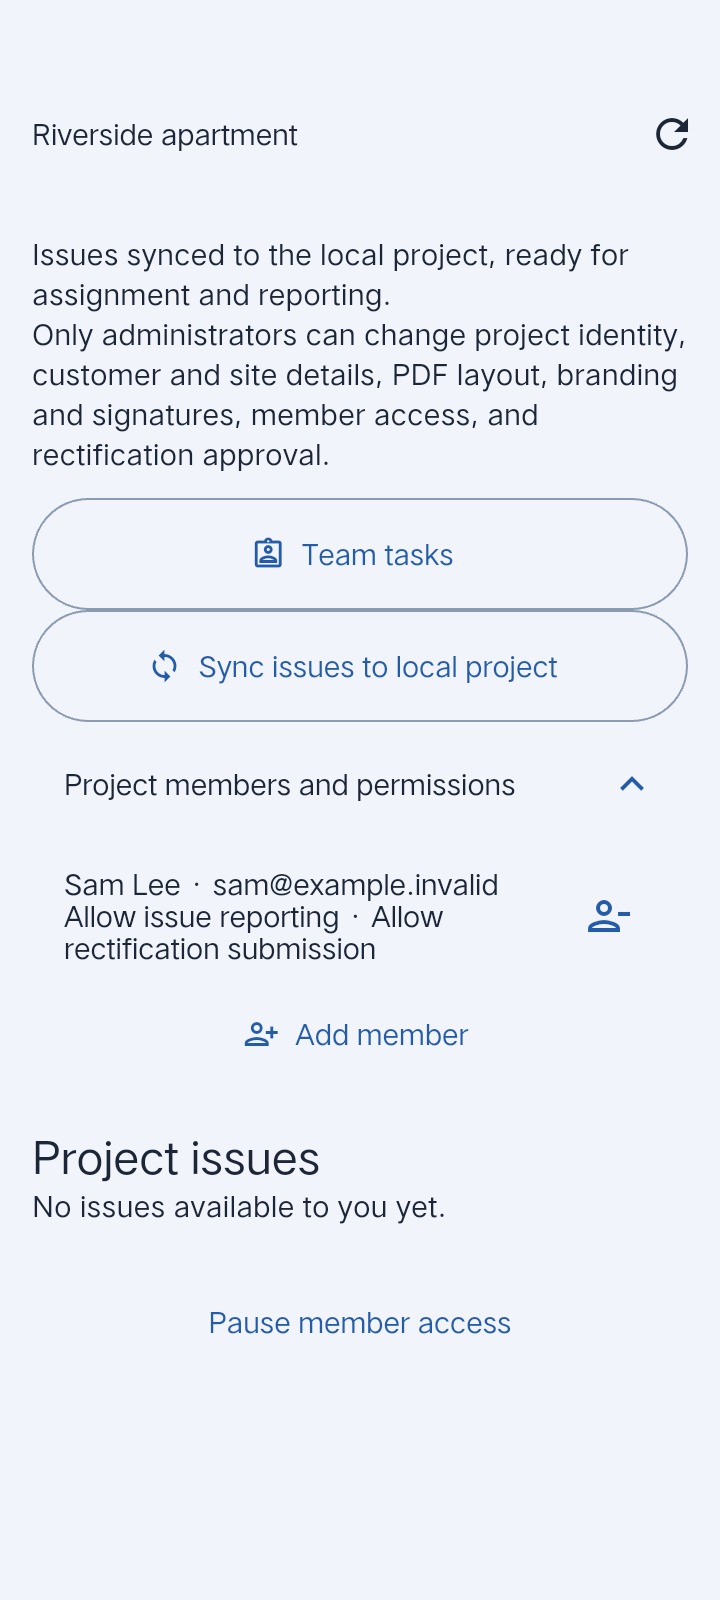
Choose project members and their two operation permissions.Actual app UI · Demo data · Tap to enlarge Receive reported issues
Members with reporting permission can submit a title, description and 1–6 photos. The issue enters the project immediately without a reporting approval step. Open the original project to synchronize it; if necessary, use Sync issues to local project and retry after a connection error.
Assign the work
Open an unresolved issue and choose Assign issue. Select a project member who has rectification permission, add instructions and a due date as needed, and publish the assignment. The member works on their own assigned tasks rather than browsing the entire local project.
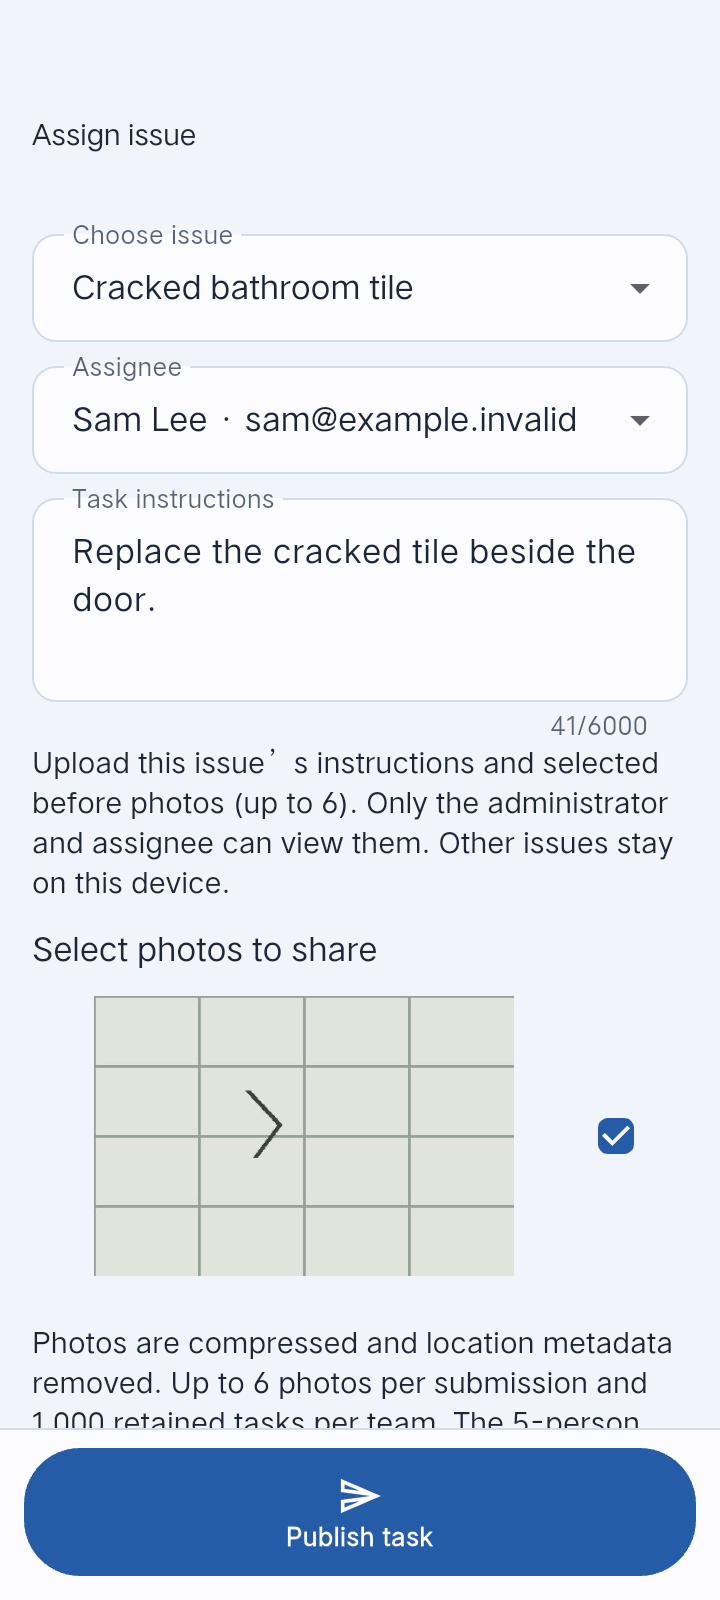
Select the issue, the member and the evidence to share.Actual app UI · Demo data · Tap to enlarge Accept the rectification and sync
Open Team tasks to review the submitted photos and note. Choose Approve and sync to import the accepted evidence into the original local project, or Return for changes with a reason. Reporting new issues has no approval step; rectification acceptance remains an administrator action. If local import fails, retry synchronization before exporting the final PDF.
Manage access and deliver one report
Keep the project name, customer/address, PDF layout, branding, signatures and member permissions under administrator control. Export the consolidated report after syncing. To replace a member, reclaim their license and grant the seat to another registered account, then add the new member to the appropriate projects. Removing access keeps previously imported local evidence.
Team member: report and resolve your tasks
Enter the right project
Sign in with the exact email authorized by the administrator. Open Account → Team projects and select a project. If the list is empty, ask the administrator to add you to that project as well as grant your software seat. Team entries appear only for authorized team accounts.
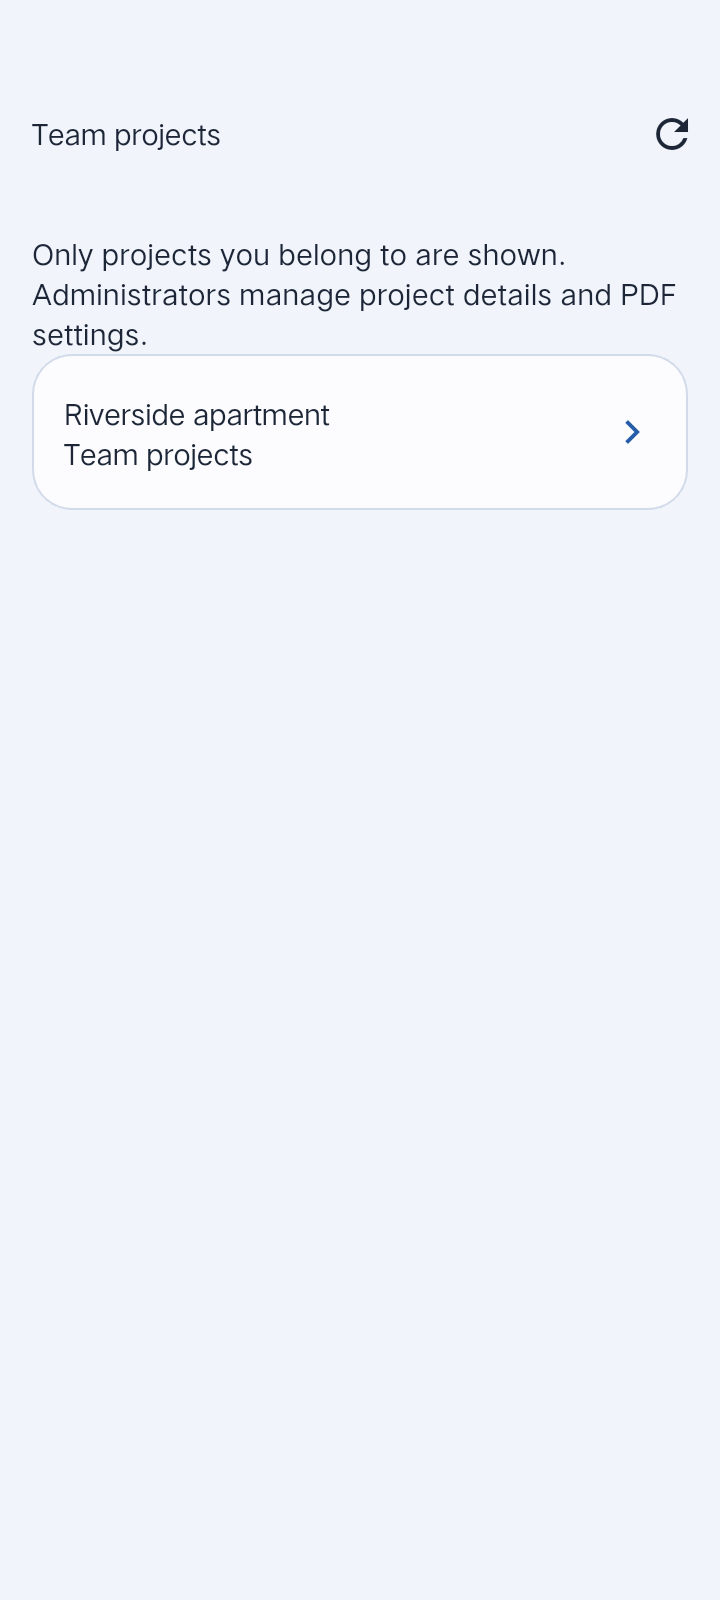
Members open their projects from Team projects.Actual app UI · Demo data · Tap to enlarge Report a new issue
If Allow issue reporting is enabled, tap Report issue. Enter a title, add a description and 1–6 photos, then tap Submit to project. Check for the success confirmation. A failed upload keeps the draft so you can retry. You can see your own reported issues and the tasks assigned to you.
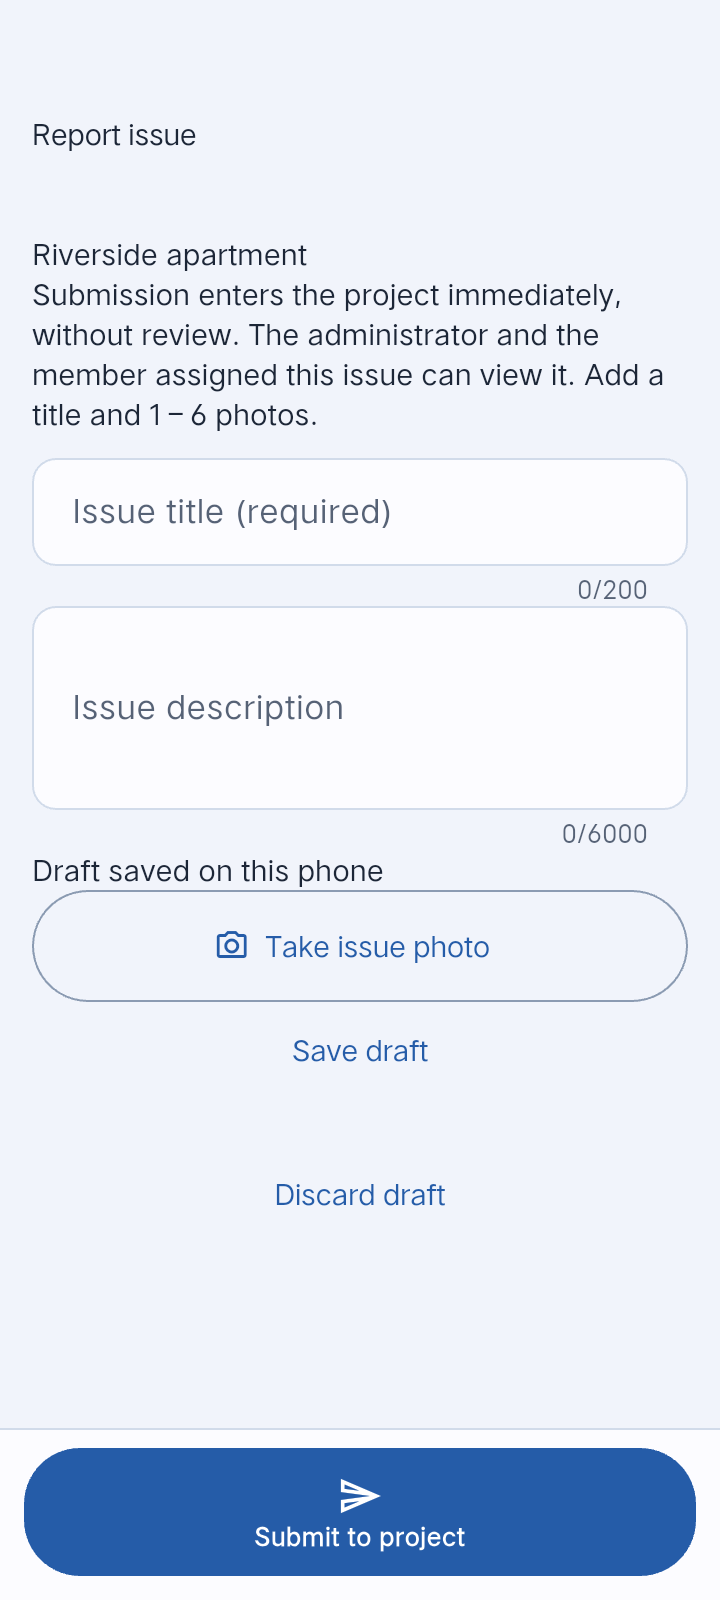
Enter a title and attach evidence before submitting.Actual app UI · Demo data · Tap to enlarge Submit rectification evidence
Open Account → Team tasks, select your assigned task, read the before photos and instructions, then add after photos and a note. Tap Submit rectification when ready. Refresh the list to see acceptance or a return reason; if returned, update the evidence and submit again. Team updates currently rely on refresh, so check the list regularly.
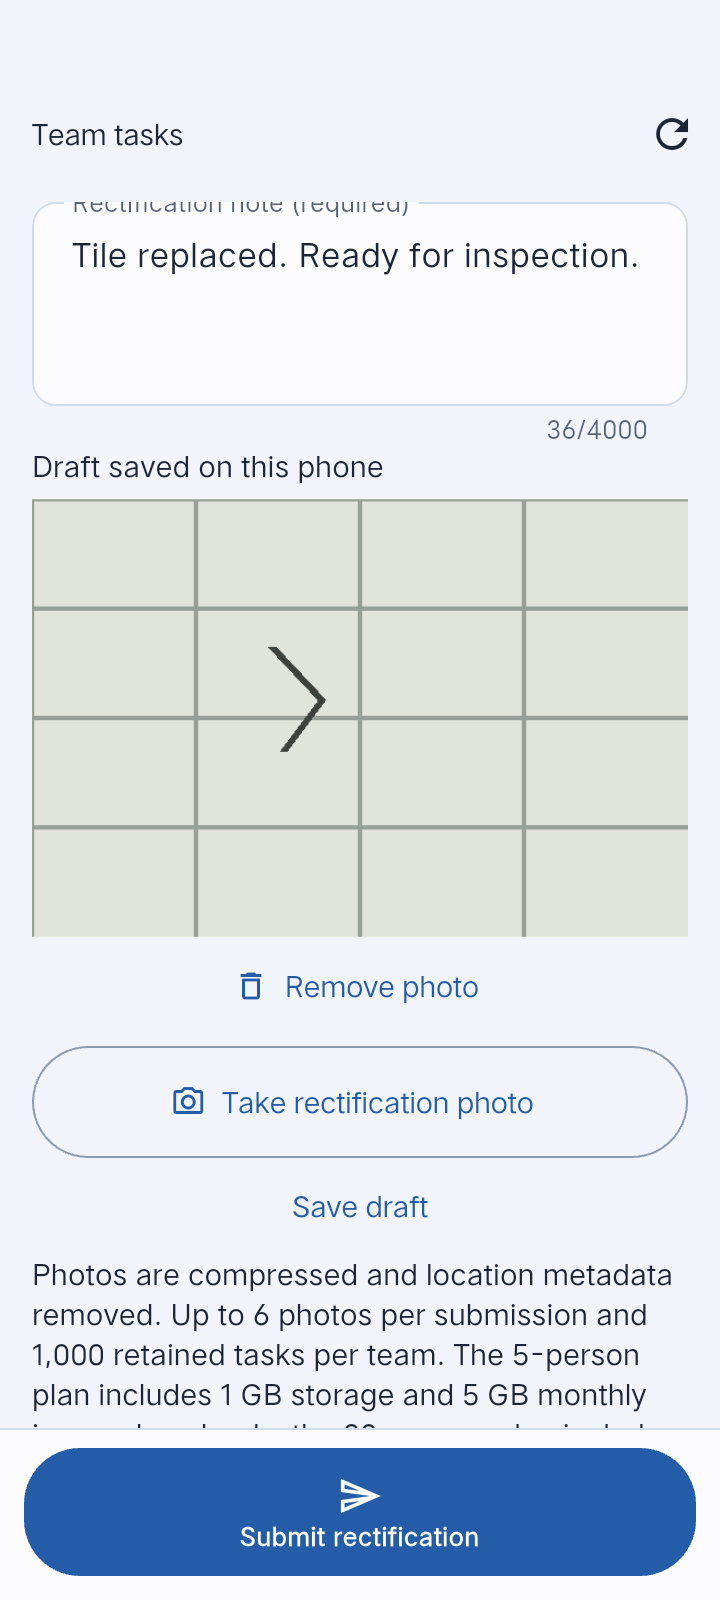
Add the result and after photos to your own assigned task.Actual app UI · Demo data · Tap to enlarge
Make the report your own
Start from a built-in layout
Open Account → PDF templates. Start with Standard, Compact, Photo-first or Rectification comparison, then preview using sample content. Save your changes as a named custom template. Choose a template in a project for that report, or set a default for new work.
Use either editing mode
Edit in the App keeps the native controls for branding, photos, content, headers and footers. Design on the web opens PDF Studio inside the app: select a starter, adjust blocks, and use Preview in App to view the actual PDF. Save the template to reuse it.
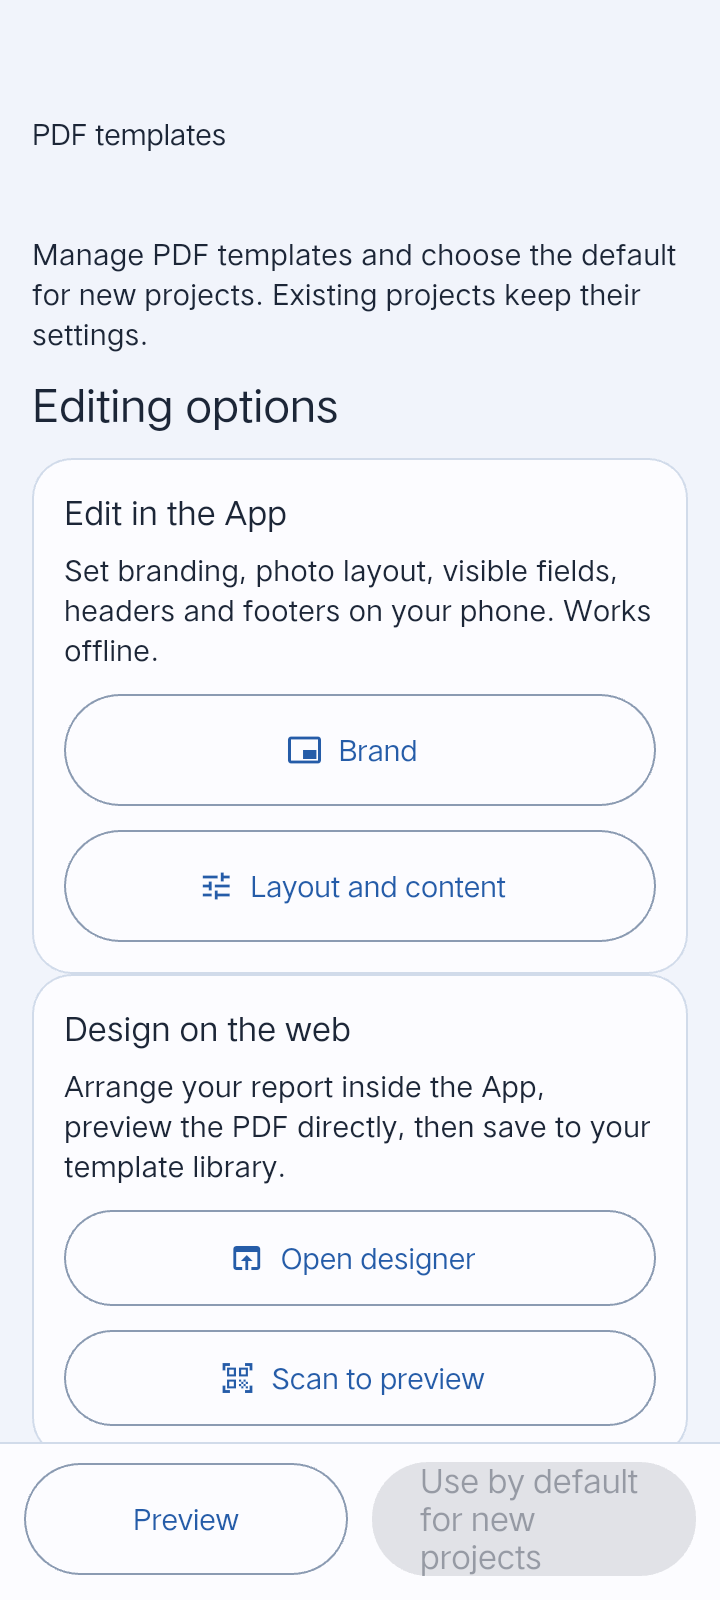
Both editing modes are in the PDF template library.Actual app UI · Demo data · Tap to enlarge Preview desktop designs on your phone
When using PDF Studio on a computer, generate the preview QR code. In the app, open Account → PDF templates → Scan preview and scan it using the same signed-in account. The QR request expires after two minutes; generate a new one if needed. Changing layout or branding alone does not invalidate signatures; changing issues, photos or rectification information does.
Example report
A sample, not customer data. Your report uses your project photos and information.
PDF Studio ↗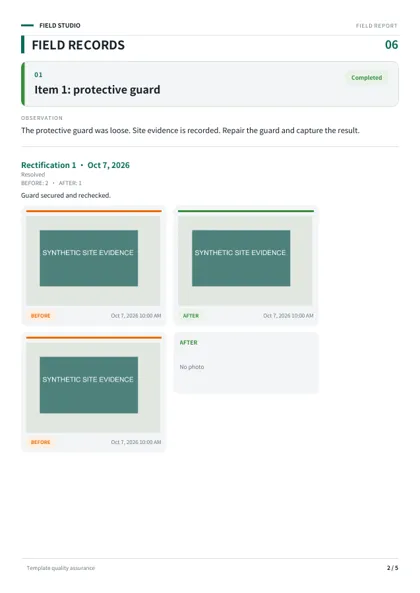
Common questions
Why can’t a member see a project or a button?
Check the signed-in email, software authorization, project membership and the two project permissions. Refresh online. Paused projects, removed members and reclaimed seats stop access. A re-granted seat does not automatically restore project membership.
Does a team plan include unlimited cloud storage?
No. The 5-person plan includes 1 GB shared storage and 5 GB monthly image downloads; the 20-person plan includes 5 GB and 20 GB. The first cloud year is included, with manual annual renewal afterward. Check Account → Team licenses for your current status. Cloud expiry pauses online photo uploads and reads; already synchronized local evidence and exported reports remain usable.
Can customers view a report without installing the app?
Yes. Publish a customer viewing link from a PDF preview and share it with the customer. It is a report snapshot, not a live project: publish a new snapshot after changes. Anyone holding the link can view it. Links last 30 days and can be revoked; feedback does not automatically change issue status.
How do I protect or move local projects?
Use Account → Backup and restore to create a .fieldreport backup and keep a copy outside the phone. Restore that backup on the other installation. Login and team authorization are separate from project backups. Do not clear app data or uninstall before backing up important work.
Still stuck?
Tell us your app version, phone model and the step that failed. Use the Product support topic in the contact form.
Support